Showing posts with label pattern review. Show all posts

Sunday, December 4, 2016

Sewing For My Man

Is it just me or are men's clothes of medium quality and very expensive or terrible quality and kind of expensive? I was sick of Pete's clothes falling apart or pilling so bad they were translucent that I decided to make him a new sweater. He liked Thread Theory Newcastle Cardigan and I am a loyal fan of The Fabric Store's merino wool.

My handsome man! He says the sleeves are too long besides me having him try it on to confirm so I'll have to take the cuffs off and recut sometime. 

Pattern was fine, I do really like the way they put together their patterns. I'm not the biggest fan of Thread Theory's armscye drafts, they always seem to be puffy, almost feminine, which can be seen even in some of their samples so I fought to keep this one looking good. I think I did ok.

Required booty shot. There's a tiny bit of pilling where his backpack rests, but that's expected.

To jazz things up a bit I quilted the front and back yokes in a light-shade and weight merino. I quilted the yoke pieces then sewed them to the body, rather than quilting everything together, which turned out really well. Even the undercollar is quilted because I'm fancy like that.

I made him put on his sweater inside out in an airport to the confusion of a couple watching us

The insides of this garment are gorgeous if I do say myself. The shoulders are stabilized with twill tape and I am so proud of them! I've made Pete take it off to show people the shoulders. My machine couldn't make it through the layers of the button placket for buttonholes so I took it to a tailor in the city. It was $10 a buttonhole! I was ticked it was so expensive, but the sweater had languished closure-less in the closet for two months so I went ahead and paid. The buttons are lovely things from Stone Mountain and Daughter.

Little tack to keep the facing from flapping around and ticking off the wearer who gets ticked off at clothes easily

The weight of this is absolutely perfect for the Bay Area's constant chilliness. Pete overheats really easily and merino wool is perfect for regulating temperature. I want to make him another one, but the Newcastle is a fairly specific garment so we'll see what else I can do with the pattern.

Wednesday, September 7, 2016

Ms. Morris and the Quilted Sleeve

So I moved to the San Francisco area back in November and no lie, the temperature has changed by at most 10 degrees that entire time. My body still thinks its sometime in February. My wardrobe made for Boston and then Los Angeles weather, either hot or really, really cold is just not cutting it. I need a max 75 degrees and windy as f--- wardrobe.


Enter my new Morris from my pattern soulmate Grainline. Ms. Morris is perfect, I can throw her over my large collection of sleeveless blouses and wear them to work and through the wind tunnel that is San Francisco. The fabric is an amazing merino wool, nylon, lycra blend from my fabric store soulmate, The Fabric Store. This fabric is probably stretchier than what Jen recommends, but the nylon and lycra content give the fabric an amazing recovery and there has been absolutely no bagging whatsoever. I interfaced the facings, but not any of the body.

The pattern went together beautifully, minus some changes that were completely my fault. I did a combination FBA and general lengthening and even though I thought I transferred all changes to the facing, I did not and didn't have enough fabric to recut them. I then removed the added length from the front, so the general shape of the hem is not as angular as the original pattern.


My favorite part of this blazer is the double layered and quilted sleeves! I love them! (they are also the reason I didn't have enough fabric to recut the facings) The wrong side of the fabric is kind of nubby so it needed to be lined in some way and quilting them like this was by far the most badass. I used quilting adhesive to keep the sleeves together and my walking foot so that everything would be nice and smooth. Love that walking foot. The only problem is that the sleeves are now a bit too heavy for the jacket so I used some black twill tape on the shoulders to keep the sleeves from pulling them down.


If I could change something about this blazer, I would probably line the fronts instead of facing them. When the SF winds blow my jacket open and then catch the facings, this literally turns into a parachute. Also the added weight of a lining would hold the sleeves up better.

Tuesday, September 23, 2014

Pattern Review: Burdastyle Karl Lagerfeld Mini Skirt

My recent schedule is conducive to neither sewing nor blogging as its following the order of LA-Chile-Boston-LA-Chile-Boston-LA. I now even have platinum status on American Airlines -early boarding, overhead bag space like a pimp, free MCE seats. Don't know what MCE means? Up to 6" more extra legroom in that smelly, dry metal tube palace of comfort.

Whenever I'm not hurdling over the equator at unnatural speeds, I try to sew. One of those projects was based off of this picture that I pinned.

Happy Endings, loved that show!
The pattern I decided on was Burdastyle's Karl Lagerfeld miniskirt, based solely on Karl's name and the awesome skirts ladies before me had made (looking at you, Delphine!). This is my version.


Well those look nothing alike.


This was my first burdastyle pattern. I did not like it. Bad instructions, bad pattern pieces, no seam allowances, choke me now. I tried to put in the front fly zip, but the zipper was so big, it...um....looked like I had a....um....super-long....male bit(?) outlined on the front of the skirt (really trying not to be google-able for weirdos!). NOT a good look. So I ripped that out and put in my first exposed zip. The new problem is that whenever I sit down the zipper bulges out like a dude's....oh you know. I did not take a picture of that for you, sorry. What I do love about this skirt though are the snaps. This is the first time I've used and installed snaps. I used the Snapsetter, love that thing! Close up, no bulges, I promise.


The elasticized waist gives everything a good fit.


I used Mood's eco twill which I bought wayyyyyy over a year ago (come on girl, get your ass in gear!). The fabric has a nice color and sheen, but it didn't want to press sharply. I trusted the description about it not needing a prewash because I'm all about the eco-save-water-stuff. It worked! You don't need to prewash! If you need a good solid, basic eco twill, go for this stuff.

All in all, I don't like this skirt much. I need to accept that the high-waisted silhouette is not for me, and nor are man bulges.

So, my hands are in my pockets in all these pictures, but I'm engaged! I'm so happy and you bet your bananas that I'll be making my own dress!

Wednesday, July 30, 2014

Pattern Review: Briar by Megan Nielsen


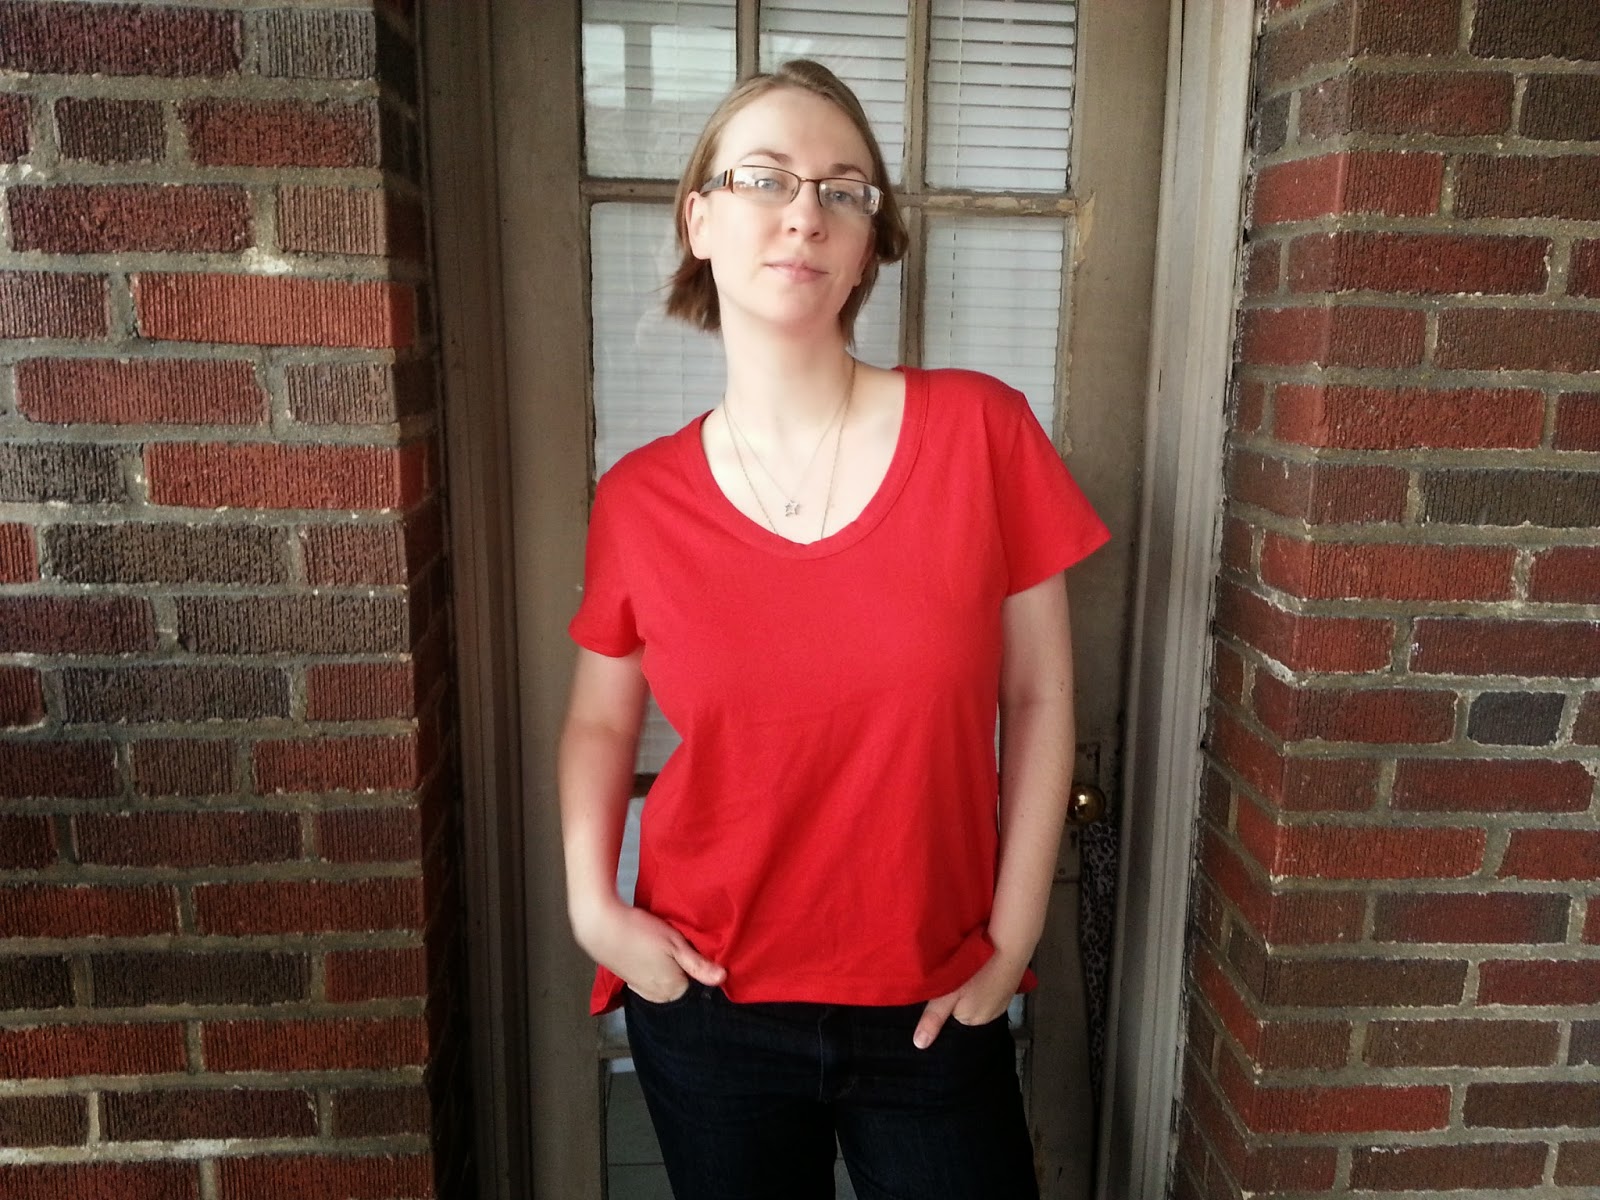
I've always wanted a red t-shirt, isn't that cute? I was 9-or-so and I went to a birthday party and one of the other girls had a red shirt and I thought she looked so cool. I tried to make a red-T in high school, but it was one of the first times I worked with knits and the pattern was all wonky, so I tossed it. Not before trying to pawn it off on my BFF because I was hoping it was just my body being wonky, but it was wonky on her too. So I'm 28 and wearing my first successful red t-shirt. What a novella about a silly little shirt!

Well aren't I too hot to trot? Briar is a fairly trendy top, but its been out for a while I don't feel like a fashion victim in it, so maybe it isn't actually too trendy. The pattern is really nice, well done. I like the font on the pattern pieces, like Megan drew the pattern just for me. The instructions were well done too, very clear, but it is just a T so there's nothing complicated. I actually reduced the hem by a couple of inches all around and now it hits the perfect spot in the front and and the mullet isn't too long. 


Seeing how this shirt was nearly 20 years in the making I went all out and bought red serger thread since my serger was going to be prominently featured in sewing the knit together. It looks really nice on the inside, EXCEPT I was worried about ripply hems so I interfaced the hems. Now the hems flip out all the time and all you see is white interfacing. The best laid schemes of mice and men.....

That's my short hair after a nap.
So how do you keep twin-needle hems from flipping out? I'm thinking I need wider set twins, any ideas?

The fabric is organic cotton jersey from Mood, here. It has no lycra and in my opinion not enough drape for the mullet style. Can you see how it sticks out from my hips? Briar needs something drapier. Also I think some lycra content would be better because over time the neckline has stretched out and rippled something fierce. 


I now have the power to make all the red t-shirts in all the world. If my 9-year-old self could see me now.

Wednesday, August 7, 2013

Pattern Review: New Look 6097


I'm totally messing with the shape of this thing, but look at my pocketses!

I've been lusting after New Look 6097 for a while now and all thoughts were confirmed. Unabashed success! I went three sizes smaller than the pattern indicated for a correct fit with a very sturdy Italian knit. A very sturdy Italian knit which I discovered likes to unknit itself at an alarmingly fast pace. The pattern calls for a lightweight knit, but this beauty works too! I stabilized the shoulders and pocket openings with the selvedge of some teal silk and tacked down the cuffs, but otherwise followed the pattern exactly. Some previous reviews added elastic to the neckline, but this knit is so meaty especially with the multiple layers of fabric at the neckline, I'm not much worried about mine. I did hem it a lot shorter though, a little too short in the end. Oops. I used a stretch stitch to sew the hems and the space-dyed pattern is so busy you can't tell there's even thread there. 


Hey, look, a button that took me 30 minutes to pick out. Its gold. And plain. This picture shows the colors of the fabric better, it mainly red, gold, and teal, but it seems like everything is in there. Its a sold out fabric from Gorgeous Fabrics. The grain of the pockets was half a design choice and half a lack-of-fabric requirement.


The dress looks really cute with a black belt, but I forgot to throw it on for the pictures. This was meant to be a work dress, but its a little short. I figure the longer sleeve balances things out so its still good. I'll just wear it with a black blazer and leave the hooker shoes at home.

My hand looks alarmingly tiny.

I think this is the: I'm posing but my cats just tripped me picture.

This is a fan-frickin-tastic pattern, I can make a million of these.

Tuesday, June 18, 2013

Pattern Review: Simplicity 2584

A couple minutes after yesterday's thunderstorm.

So I have a bunch of fabric, none of which really excites me anymore. I really like the cover of Simplicity 2584, but I don't like clothes made out of stiff woven cotton and even though I knew this was going to end badly, I just went ahead and did it. So I present Simplicity 2584 in a cotton poplin. Yea.

It looks like scrubs.
It sits really very high and very far from the back of my neck.
Invisible zipper on a casual shirt? Bleh.
I was going to add the gimmicky front do-dad from the cover of the pattern but for the life of me, couldn't get it to lay flat and centered so I threw it away in disgust. I also raised the slit by 3 or so inches because, whoa, dude, that was loooow. All the facings turned out really well so it isn't a bad pattern. Everyone else seems to love it and they look great in it. I think this would be really great in a stable knit with no dumb zipper so maybe I'll just think of this as a muslin and just consider it a win.

Otherwise its already being used for a good cause.
Hey Foliage, I'm probably not going to wear that so you might as make yourself more comfortable. 
There you go.


Sunday, June 2, 2013

Pattern Review: Archer Button Up Shirt

Excuse the sweaty face, its hotter than a chicken's feathery undercarriage around these parts.

I have been in desperate need of an Archer since the handsome beauty was released. The pattern is really really fantastic. Tons of what I call precision sewing though, as in lots of top stitching very very close to the edge. I confused myself with the instructions, but that's totally my fault. I was going back-and-forth from the printed instructions to the sew-a-long and messing myself all sorts of up. The sew-a-long is really really great though.

These are a lot of really great details in this shirt, and guess what?! You can't see them because I choose the loudest, busiest fabric I could find. And I love it! There are pockets, plackets, a collar, pleats, buttons, but who would know? Its a cotton voile (my absolute favorite fabric to work with, easy to deal with yet drapey) from Fabric Place Basement near Boston. I did see the fabric online from Hart's fabric about half what I paid at FPB, wtf, but in white, not the minty blue-green here. This is also my first animal print article of clothing, how terrible is that?!

Irish descendent legs.

This pattern takes a lot of fabric. When I was getting it cut and the lady found out it was a button down, she and the other women around the cutting table was convinced I was getting too much and didn't know what I was doing. Ye of little faith.

Anyways, I'm pretty passionately in love with this shirt. I even for the first time bought a buttonhole cutter, scalpel style, because I only wanted perfect buttonholes! I called one of the local small stores in Boston to see if they carried buttonhole cutters and the response, "You can just use a seam ripper for that." I've used a seam ripper for that my entire sewing life and I hate the results. Anyways, the cutter is amazing, no threads fraying or pulled, loved it.

(do not) Pop thy collar.
I want another one of these in a black textured voile with the butt ruffle. Strike that, I need one of these in a black textured voile with a butt ruffle (one size smaller).

Melted feline with a newly shorn belly.

Monday, May 27, 2013

Guess who's back!

I'm back, I'm here, hallelujah! I passed both my classes (I love how once you get into grad school, you don't care much about the grades anymore), but still have my big oral exam coming up. Early July is the new goal, here's hoping.

I finished my final exam on a Wednesday a couple weeks ago and came home with what my boyfriend called an excess of creative energy. I HAD to sew something. So what did I choose? Something simple and familiar. Hells NO! How about something I've never ever done before.

Jersey. Slippery, slidey, stretchy craziness. A Mission Maxi.

Not high in this picture, just in case you thought so.
And it turned out sooo well! What a return to the game. Check out those matching side seams.


Ok, maybe not the matching above the waist, but below the waist it flawless! The jersey is from Gorgeous Fabrics, and they still have it here! I followed the instructions and they were great. Everything is serged (wow, was the serger a rockstar on this fabric!), except for topstitching the neckline binding. I ever so slightly stretched out the armhole binding on one side, but its only noticeable to us, right? I also serged the hem but didn't hem it in any way because I wanted as much stretchiness as humanly possible. Also, the pattern is true to size, what a concept!


Closer look at the binding. The neck binding is cut with primarily the yellow color and the arm bindings are cut with primarily the blue color, a detail only the maker could love.

Funny story, but promise not to tell my landlord, mkay? I finally bought some tracing paper (ok, exam paper, but the same thing). I traced this pattern because I know my mom wants one of these someday and I wanted to preserve the pattern. Little did I realize that permanent marker goes right through exam paper onto the wood floor below. Ruhroh. It'll wear away by the time I move out? Right? RIGHT?


I feel pretty.

AND I'M BACK, BABY!

Sunday, January 13, 2013

Pattern Review: Riverbed Shawl

There was nothing better to follow up my enormous, never-ending previous knitting project than with a shawl that took me two days to knit. Two glorious wonderful days.

The shawl is one of my diy Christmas presents and is going to my lovely future mother-in-law. My boyfriend's contribution was picking out the colors and they are very beautiful colors.

The pattern is from Twinkle's Weekend Knits which has the best bulky yarn patterns. I LOVE Twinkle! I used Blue Sky Bulky yarn which is soft and fluffy and yummylicious. My two yarn loves are Noro and Blue Sky, they are the best stuff. The pattern calls for 9 stripes, but I only made 7 to reduce some bulkiness in the width which was perfect. I also reduced the 13" (!) fringe down to 7", wayyy more manageable. I've never put fringe on anything, it was quite fun!

What a pretty project, I hope she loves it!

Now here's the shitty part. I was so anxious to get this in the mail that there's only one picture and it was only discovered serendipitously on my boyfriend's phone.


...yeah.

Wednesday, January 9, 2013

Pattern Review: McCalls 6325

I finished another project, I am on fire! When I finished this top, I only had one, 1, ONE project left on the table. That's a freakin' record, I love to start projects and have issues with finishing them. I only have 2 knitting projects unfinished, its a miracle! I don't want to talk about general crafts though, that's a disaster.

Sunny day in sunny CA!

I really love the shape of bustier tops, but they don't usually fit my body, but a bustier pattern with cup sizes! Awesome-sauce!

Great fit! Awesome haircut!
So, the pattern was great except for the cups. Ironic right? I made the D-size cup so maybe the fit issues came from that, but as written, the cups would very well fit Madonna cone bra boobs, not human woman breasts. If I had taken pictures of what came out of the pattern envelope, you'd be on the floor laughing. The couple other reviews I found online didn't have any problems, but it appears they used smaller cup sizes. Admittedly I didn't check the measurements, but I'm sure as hell not an A, B, or C and I can't imagine larger boobs fitting in that pattern. A lot of adjustment went into getting the top of the top to fit. My amazing boyfriend helped a lot and I think he was happy to.

The other change that I made was more buttons! More buttons! I hate button gaps. But then I realized that I would have a buttonhole right on top of a seam so my button holes are totally uneven and very (sarcasm ahead) professional looking. Anyways, there are absolutely no button gaps. This thing is SOLID.

Just what I needed! A good underlayer.
The fabric I used was Amicale silk-cotton broadcloth and is really really nice. Like really. On a wish and a prayer I prewashed in the washing machine and it turned out well so I may try that again with the finished product if I'm feeling dangerous. I got the fabric from Gorgeous Fabrics, but its no longer available, I got it almost exactly one year ago. Don't let anyone tell you I procrastinate.

This is a good pattern idea with lots of changes, but I want to make it again. I want the cups to go a bit higher everywhere. Also they seem to wing out a bit at the sides and I'd like to nix that. I want to wear versions of this top all summer with pretty little skirts, like Megan Nielsen's Kelly, how grand!

My family's new dog Rocky likes it too! He also goes by Rocky-Do, Rock Star, and Stanky (he likes to roll in deer poop, but who doesn't?). Always adopt, never buy.

Wednesday, November 14, 2012

Pattern Review: Tuck Stitch Lap Throw

I finally finished the wedding present for my future brother-in-law and his lovely wife. Its only over three months late, that's ok right?

Its enormous! That's a queen bed to give you an idea of the size.


I used Cascade 220 in coral and bright blue, the couples favorite colors, but the coral is a bit redder than what it looked like online and the contrast from the blue makes even redder. So I guess I made a red and blue blanket. I used 5 skeins of each color for the body and 1.5 skeins of coral for the border.


Oh the border. The pattern calls for a an entwined, I-cord border. I knit about one-half of the border and HATED it. Completely and utterly. The busy stitch of the body needs a simple border to highlight it, not compete. So instead, after knitting the body I picked up stitches and knitted up a simple garter stitch border. If I were to knit this again (I'm not!) I would knit a garter stitch border at the same time as the body.

I kind of hate this blanket :(
It took way too long, the colors aren't right, the border doesn't look quite right with the picked up stitches. I'm going to hand it to the happy couple and say, 'Here's your wedding present, I'm sorry, let's go burn it together'.

In other news, knitting takes FOR-FRICKIN-EVER! Nearly all of my knitting plans for 2012 have been cancelled, damnit!

Passed the happy paw test.
Previous post about this project

Saturday, November 10, 2012

Pattern Review: Hot Patterns Biker Babe Jacket HP 1037

Its done, its done, its done! I could scream it from the rooftops! I have never been so proud of something that I've made in my life. That's about 20 sewing years, countless culottes (hey, I started when I was 7), and more seams ripped than stars in the sky.

Zipped!

My new jacket. The main fabric is made out of the softest camelhair ever (from Gorgeous Fabrics, no longer available) and the lining is a pretty medallion print poly (also from Gorgeous Fabrics, also no longer available but there are other colors, this one is so pretty!). One thing to note about the lining though, in really really tiny letters is the name of the designer Elie Tahari, but its only noticeable if you are about 1" from the fabric.

Now this pattern. Oh boy, this pattern. I had a lot of issues with it. Noted in these posts:
Update #1
Update #2
Update #3 Warning Hot Patterns rant in this post

To paraphrase these, the changes/problems I had/made were:
Jacket way too short, lengthened by 2" all over, would probably add 1.5" on to that in the future for a total of 3.5".
Sleeves way too short, also lengthened 2".
Armhole too low and raised by 3/4" (I think).
Ease in arm (even after adjusting for the raised armhole) way too much.
Back too tight, broadened by about 3/4".
Waist way too big, added a 1.5" seam taking about 6 total inches of fabric out of the waist. This seam allowance was gradually reduced to the pattern seam allowance just below the arm.
Comically huge collar decreased by about 1.5".
Lined.
Added a back pleat to the lining.
Added a simple inner patch pocket.
Did not add the belt or boob pockets.


Some details added to the lining are visible in these pictures, as well as which lining pieces I chose to make in the lining fabric and which I chose to make in the camelhair. Ignore the puckering please.

Unzipped!

Lining was easy. I bagged it, then handstitched the sleeves and a small part of the bottom band (through which I bagged it). I also didn't interface anything except the upper collar, really took a risk there, but the lower collars have the perfect 'stiffness' with the two layers of camelhair. Whew.

Checkout the fit in the back!

I'm going to make this again, twice more in fact. One in olive green twill with a poly sherpa lining and the other in a tweed with no upper collar. I'm not sure that I would recommend this pattern as a LOT went into making this workable, moreso than I think should be expected using a pattern. If you really want this style jacket, well, it was all worth it for me.

Sunday, November 4, 2012

Pattern Review (kinda): McCalls 5803

So I've had this pattern for a million years and I've had this fabric for a million years and somewhere in those million years I totally lost my mind because I combined said fabric and pattern. See for your self.


What the HELL was I thinking? I even added pockets! I should be ashamed of myself!

Tuesday, August 28, 2012

Pattern Review: Sencha!


So I finally got around to doing what every other person with a sewing machine has done, make a Sencha, heck, make any Colette pattern! I was worried about Sencha. To my eye it can be a really cute take on a 20s/30s shirt, but it can also turn into hospital scrubs. I wanted mine to err on the side of cute.

For the fabric I chose a black-and-white lightweight cotton voile from Gorgeous Fabrics. I've decided I need to sew clothes that are washable, no more of this dry cleaning shizz, and the fabric perfectly fit that bill along with being a lot of fun. The print is super cute, and when you actually see the fabric, there are little raised white dots that catch the light. Its almost like having two prints interlaced with each other. It irons like. a. dream. Let's just say I had a disaster project recently and to make matters worse, the fabric didn't take the iron very well. Grrrrrrrrrr.

For the pattern sizing I fell between two sizes and the pattern says to pick the larger size, so I did. The instructions were easy to follow, here are some changes I made on the way.
  • Made the shoulder seam a french seam. I can't stand raw edges and the seam adapted really well to the french seam process.
  • Pulled my hair out trying to figure out a way to finish the side seams. Its different because in the side seam, there's a ninety-degree angle so a french seam or serging is out. I decided to use my regular machine on a narrow zig-zag. Its not the most elegant, but its clean and won't unravel. I know I could pink both these seams, but pinking makes me twitch. Like all over twitching, I do no like pinking.
  • Interfaced the buttons and buttonholes.
Couple things I wish were different and will change next time.
  • There is no fold line for the sleeve. I didn't realize this was going to be a problem until it was. See, you have to fold the sleeve over after sewing everything together and folding a proper straight line after the fabric is twisted and sewn is not easy. Just quickly marking a straight line before making the arm hole would save a little grief. I could be getting a little crazy about the straightness of my armhole fold, who knows....
  • Whoopsie-balls. I put my buttonholes a bit further away from the center edge than the pattern calls for. But then again, the pattern didn't make this clear, I found this out of the Sencha forum on the Coletterie.
  • I started the first buttonhole at the neck too far down.
Now the real problem. This shirt was wayyyy tooooo bigggg for me.  I decided this pattern would be pretty easy to alter after the fact which is why I didn't make a muslin and went ahead and finished the whole thing before thinking of any changes. It fit well across the bust, back, and shoulders, but was too wide for my waist and veered into scrubs territory. Removing most of the back tucks and then extending them up to the top of my waist as darts made for an easy change and a great fit!

Great fit at the back, but that first button is way too low.


I really really love this shirt and I can see more fitting well into my wardrobe. I've already tried it with a bunch of clothes already in wardrobe rotation and it even transitions well into fall so I can wear it for a long time! Woohoo! New shirt! Great shirt!